Fitted and glued the inwales, knees and breasthook. Lots of fiddly parts to fit, trim fit again, trim again and again and again, for many hours. But the result is pretty rewarding.

Inwales trimmed to length and clamped in place ready for breast hook final fitting.

Breast hook halves ready to glue in.

Fitting transom knees.


Odd angles everywhere.


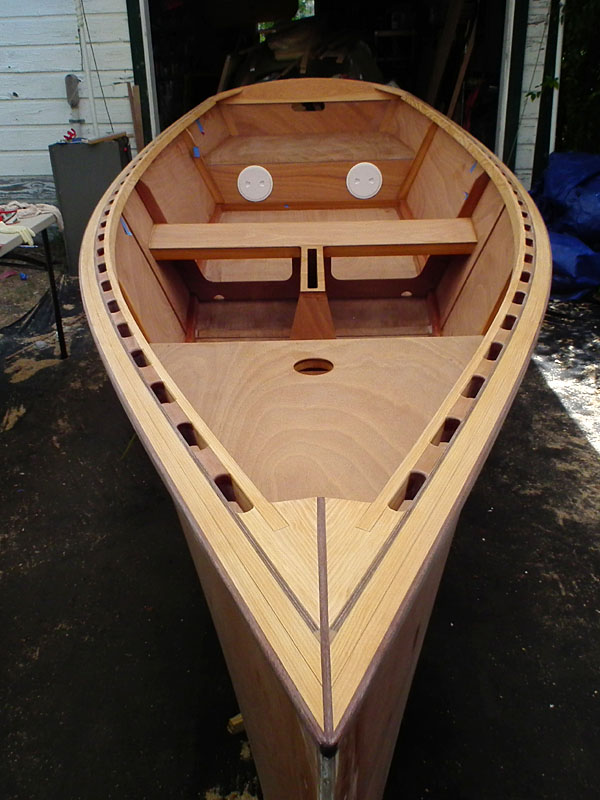
Was going to do the same semicircular cut as on the breast hook, to match the inwale spacers but the angles got the better of me and I gave up and cut the offending bit off. Another inwale spacer fills the space.

Used the deck plate frame as a template to trim masking tape. Keeps the sealant mess to a minimum.

I'm using deck plates which have low profile frames with no fasteners so spring sticks, made from ply offcuts, hold them in place while the goop cures.

Got a power plane to plane down the gunwales but it also makes short work of little scarfs like these for the mahogany gunwale caps.

Couple minutes later.

Gunwale structure glued up slightly above the ply, ready to be planed down to the ply.

After power planing and some hand planing and sanding.

With gunwale caps on, edges rounded with roundover bit in router and final sanded with 120 grit.

Bow sanded ready for epoxy coats.
Gunwales ready for epoxy.

First coat of epoxy attracts bastard bugs.

@$^%&*&&!!

Flipped boat over to finish bottom. The runners reveal a couple of flat spots on either side of the bottom ply joint. Ignoring them for now, will fair later.

Flush cutting bit in router makes quick work of cutting the daggerboard slot.

2" glass tape ready to epoxy on chines.

Glass tape epoxied to chines and bow. I used a plane with the blade set at an angle to trim down the tape edges while the epoxy was still green.

The fairing begins. I have hollows where the screws pulled the ply hull sides in and the tape has to be faired in.

It snowed in FL, in April!

First pass with fairing compound sanded and wiped clean. It's not perfect but it will have to do for now. Will coat with epoxy primer for Cedar Key then finish fairing later.

I used System 3 Quick Fair and it is awesome stuff. Will never go back to mixing microbaloons again.

Added a layer of 4oz cloth to the bow for extra beaching abrasion protection.

Epoxy coating the bottom, of course, attracts every bug in the hood.

While the boat was upside down on sawhorses, I used the trailer as a straight clamping jig for the yard and rudder case / tiller.
Total time to date: 435hrs


LOVE IT.
ReplyDelete"Bastard Bugs" heheheheh.
Nice touches, and good idea for the cloth up front-- and you have nice sandy beaches! That might be my project for next year, adding some cloth up front and getting rid of my bow skid.
Thanks, the cloth was recommended by a fellow sailor. Most of our beaches would not scratch a babies butt, then there are the oyster shells. Where we launched was covered with them and I was already appreciating the glass.
ReplyDelete