Thursday, May 19, 2011

Shelter skelter

Was planning to do the third and final coat of epoxy on the gunwales, last weekend, but the weather had other plans.  A severe thunderstorm (news said 70mph gusts) came through and blew my boat shelter to bits.  This shelter survived a lot of thunderstorms last summer but the addition of the bug screen sides, in preparation for a bug free clearcoat session, must have added too much windage.  Fotunately no damage to The Goat but the shelter tore and the boat filled up with a lot of water.  A drain plug of some type may be in my future.  Two weeks ago we had to delay leaving for Cedar Key by about an hour in order to not drive The Goat through a downpour.  Boat with no drain plug is already getting old.  After buying another shelter, cleaning the mess up and and setting up the new shelter I had just enough time left to install the oarlocks.

Barely missed the boat!

This is water from just hosing the salt off.  I tilted the trailer back to make it easier to bail but still a pain.  On the plus side, the deck plates did not leak a drop.  I used vaseline on the seals which helps a lot.

The oarlock is located and temporarily screwed down to immbilize it so I could scribe an accurate outline onto the gunwale.  I'm using stainless oarlocks from West Marine.  Looked everywhere and these are the nicest ones I found.  Many of the bronze ones look very rough, like they were cast using 1800's technology.  While I like the look of weathered bronze it's not quite in line with the Goat's modern aesthetic.

After scribing the oarlock socket's outline onto the gunwale I set up my trusty Bosh router with adjustable fence and held my breath while routing out a pocket for the oarlock socket flange.  This is a DO NOT EFF UP MOMENT.  One spastic move and irreparable damage occurs.  Thankfully all went well. 

Router depth stop was set to the thickness of the oar lock socket flange.  The corner radii, from the router bit, had to be cleaned up with a small chisel.  I found an Xacto knife to be useful for this.

And we have flush mounted oarlock sockets.


Total time to date, not counting rebuilding the shelter: 440hrs

Monday, May 16, 2011

Launch!

Don't have time to write much about the launch so here's just a quick update.  We managed to get The Goat into saileable shape for the Cedar Key small boat meet. There's no clearcoat over the epoxy and the hull is just primer but all of the essential bits are there. We launched Saturday May 7th next to the Island Place condos in Cedar Key. Winds were less than 10 knots which was perfect for a first sail. On Sunday we got a bit more wind and had the boat moving nicely. This is going to be fun.  Have much to learn about sailing these oldfangled rigs. 

Lots of pics in the web albums and a quckie video of the first day out on the water.  We're using the GoPro camera handheld which is a bit awkward without a viewfinder so the video is framed very poorly but you get the idea.


Photos of The Goat


Photos of the Cedar Key Small Boat Meet

Friday, May 13, 2011

Massive push to the finish

Got behind on the blog as usual but this time it's because I was working on the boat every spare minute to make the Cedar Key maiden launch date.  And we made it. Have lots of pics but first, in order to maintain chronological continuity and prevent any nasty temporal paradoxes, I will document how we got there in this mother of all posts.
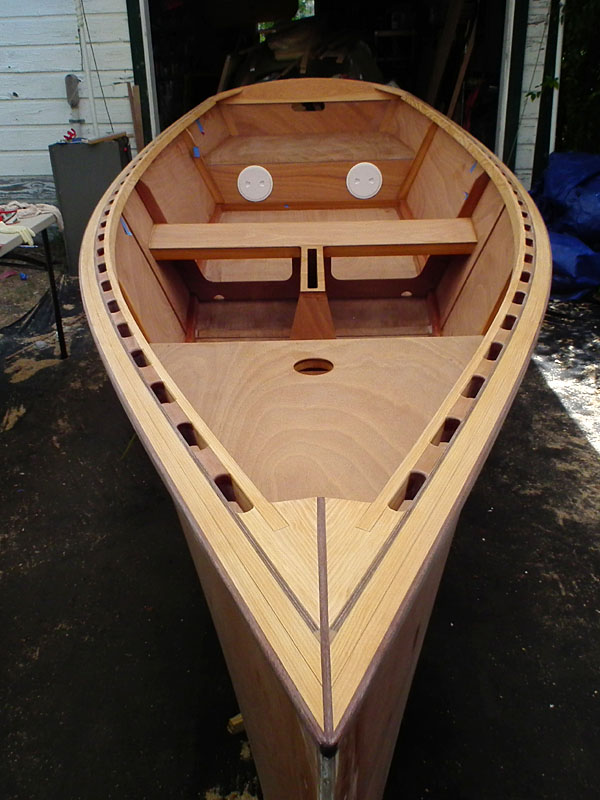
Fitted and glued the inwales, knees and breasthook.  Lots of fiddly parts to fit, trim fit again, trim again and again and again, for many hours.  But the result is pretty rewarding.

Inwales trimmed to length and clamped in place ready for breast hook final fitting.

Breast hook halves ready to glue in.

Fitting transom knees.


Odd angles everywhere.


Was going to do the same semicircular cut as on the breast hook, to match the inwale spacers but the angles got the better of me and I gave up and cut the offending bit off.  Another inwale spacer fills the space.

Used the deck plate frame as a template to trim masking tape.  Keeps the sealant mess to a minimum.

I'm using deck plates which have low profile frames with no fasteners so spring sticks, made from ply offcuts, hold them in place while the goop cures.

Got a power plane to plane down the gunwales but it also makes short work of little scarfs like these for the mahogany gunwale caps.

Couple minutes later.

Gunwale structure glued up slightly above the ply, ready to be planed down to the ply.

After power planing and some hand planing and sanding.

With gunwale caps on, edges rounded with roundover bit in router and final sanded with 120 grit.

Bow sanded ready for epoxy coats.

Gunwales ready for epoxy.

First coat of epoxy attracts bastard bugs.

@$^%&*&&!!

Flipped boat over to finish bottom.  The runners reveal a couple of flat spots on either side of the bottom ply joint.  Ignoring them for now, will fair later.

Flush cutting bit in router makes quick work of cutting the daggerboard slot.

2" glass tape ready to epoxy on chines.

Glass tape epoxied to chines and bow.  I used a plane with the blade set at an angle to trim down the tape edges while the epoxy was still green.

The fairing begins.  I have hollows where the screws pulled the ply hull sides in and the tape has to be faired in.

It snowed in FL, in April!

First pass with fairing compound sanded and wiped clean.  It's not perfect but it will have to do for now.  Will coat with epoxy primer for Cedar Key then finish fairing later.

I used System 3 Quick Fair and it is awesome stuff.  Will never go back to mixing microbaloons again.

Added a layer of 4oz cloth to the bow for extra beaching abrasion protection.

Epoxy coating the bottom, of course, attracts every bug in the hood.

While the boat was upside down on sawhorses, I used the trailer as a straight clamping jig for the yard and rudder case / tiller.


Total time to date: 435hrs


Wednesday, April 20, 2011

Inwales

Took forever but all of the inwale spacers are glued in and epoxy coated and sanded, ready for inwales to be attached.  I'm shaping the breasthook and knees before gluing in the inwales so that I have room to adjust things.

All spacers glued on ready to fit inwales.

All of the sidearm tops are hidden by strategically placed inwale spacers.

Trimming the inwales to length.

Fitting the breasthook.  Took a while fitting the funky angles. No epoxy yet.

I was not crazy about how the daggerboard case top was looking so I made a ply cover for it that I like much better.  Blue tape is masking for big fillets to hide the gaps in the butt splices. 


Took a few hours off from building to go see all the cool boats at the annual Cortez Small Craft Festival. Click on the slide show to go to the Picasa web album.


Total time to date: 347hrs

Monday, April 11, 2011

Gunwales

I decided to make the gunwales a bit wider (10mm to be exact) than stock.  The stiffer gunwale faired out a couple of flat spots around bulkhead #3.  The decision was also driven by material on hand.  I had 3/4" thick doug fir and Dave gave me a few of his 1/4" thick mahogany kayak strips to cap the gunwales with.  As a side benefit, hiking should be more comfortable on the bum.  Before gluing on the gunwales I shaped the stem. 

Used a piece of Dacron line soaked in epoxy to form the stem.  Heard of this technique being used on the leading edges of dagger boards and rudders.  Worked well and is tough as nails, except it fuzzes when sanded.  Not an issue here as the whole thing gets a layer of fiberglass tape over it.  Will have to experiment with other types of line, maybe nylon will sand nicely. 

Covered the wet epoxy with clear packing tape to shape the rope as much as possible.  Very little sanding was needed to blend the stem into the hull sides.

17 ft douglas fir gunwale strips laminating.

Went to Anderson Lumber in St Pete to get the gunwales milled to size.  The guys at Anderson are super nice and real helpful.  Here the laminated gunwale strip is going through a 1930's vintage 30" monster, cast iron, thicknesser.  

That machine is amazing.  Imagine 80 years in industrial service.

Fred and assistant cutting the bevel on the underside of the gunwale.

My wood shop, well maybe not.  Anderson Lumber's main shop.

Got the gunwales home and clamped to the sides in order to shape the bow.  Used a string line to find the location and angle of the gunwale cut.  Feels good to see the string line, attached to the center of the transom, bisect the dagger board case and end up in the very middle of the stem.  Maybe the boat is turning out straight.

Marking the cut.

Clamped a block of wood to act as a fence.  I stick a bit of sandpaper to the block so that is resists moving around and does not have to be clamped tightly.

Pull saw does the trick.  I eyeballed the vertical angle.

Cut and cleaned up.  You can see the sanded rope stem here.

Since the gunwales will be capped with mahogany, I decided to run a strip of it down the middle of the breast hook. 

Fitting up the mahogany strip.

After the gunwales were cut and fitted at the bow I screwed them to the hull sides making sure that each temporary screw hole would later be hidden by the inwale spacers.  This let me eyeball everything for fairness without the clamps getting in the way.  It also decreased the alingnment drama during gluing.

Can you guess what is going on here?  Gunwales gluing, but the very last inch or so, aft of the clamps, was slightly pulling away from the hull due flex in the ply.  So this rig applies just the right amount of pull in the right direction to close the gaps.  Note the dead blow hammer used as lever arm weight adjuster.  Very proud of this rig.

Mmmm me likey!

Total time to date: 311hrs